INTRODUCTION
- Status: CURRENT
- Version: 4
- Date: 2/3/2015
- Creator: Nick Woodland
CHANGE REVISION HISTORY
| Version | Status | Date | Handled By | Description of Change |
|---|---|---|---|---|
| 1.0 | Archived | 3/15/13 | Nick Woodland | Initial Version on Stellent |
| 1.1 | Archived | 5/20/14 | Nick Woodland | Updated to include SLA - also on Stellent |
| 2.0 | Current | 8/6/14 | Nick Woodland | All new web based HTML document posted in the new Ops Hub Library. |
| 2.1 | Current | 9/22/2014 | Nick Woodland | New enhancements added: Ability to hide or show the Navigation Content, changed color scheme on headings and titles, and improved spacing in document. |
| 2.2 | Current | 2/3/2015 | Nick Woodland | Updated doc for SharePoint 2013 details, and for updates to the templates. |
SCOPE
This document is intended for Project and Tool Site Owners managing a site within the Operations Hub. This manual will provide Owners with the necessary steps for editing their sites and also explain what type of content is housed on the Hub.
Additional steps on how they can interact with end-users and how to learn more about SharePoint will be provided.
REQUIREMENTS
Deployment Team
- Creates site as needed from internal Template
- Edits basic information to get site ready for Site Owner
- Site Title
- Contact Details
- Yammer Link
- Overview, if available
- Sets up initial Permissions
Site Owner
- Provides Deployment Team with necessary information to get initial site built
- Becomes primary site manager
- Maintains fresh content
- Informs Deployment Team of any Site Owner changes
- Becomes champion for their site
- Follows items outlined in the SharePoint Governance and Best Practices document
Intranet Site Definitions
- Operations Hub sites
- Ops Hub pages are maintained by Site Owners mostly for end-user needs.
- Wiki sites
- Wiki sites are maintained by product owners mostly for developer needs.
- Organization sites
- Organization pages are maintained to provide organizational information and team structure and duties.
- Content Server
- Content Server continues to be the recommended method for storing and backing up approved documentation. SharePoint can easily link to uploaded content server docs.
SharePoint Training
- Please login to HERE University and search for SharePoint. There are many available modules to get a deeper understanding of SharePoint than this Manual will provide.
- Get some online training here: Microsoft SharePoint training courses.
DEFINITIONS & ACRONYMS
- Ops Hub (OH) = Operations Hub
- Ops Bridge (OB) = Operations Bridge
- Site Owner = Contact identified within the Core Map Group to maintain a site within the Ops Hub.
- Deployment Team = Operations Hub Creators and SharePoint administrators for the Ops Hub.
Review the HERE Glossary for other terms
RESPONSIBILITIES
Owners must provide the Deployment Team with the information outlined in the Requirements section of this document. Once received the Deployment Team will create the site for Owners and complete all the requirements as necessary.
Maintenance on the site will be an ongoing task including both Site Owners and the Deployment Team. Owners will be responsible for the relevance and freshness of the data posted to the site.
Owners will be responsible for reaching out to end-users and creating an environment where they can freely discuss issues with Owners.
The templates created by the Deployment Team are set up to enable this discourse. Owners need to take advantage of this capability.
The Deployment Team will be responsible for ensuring in the long term that content posted on the Ops Hub is up-to-date and meets the outlined requirements of this document.
The Deployment Team will be responsible for assisting Owners with SharePoint support in the Ops Hub. This could include how to take training, how to add content to a site, or how to maximize the functionality present in the Ops Hub.
PROJECT SITE GUIDELINES
Navigation
Navigate to the Ops Hub home page (first link), the Operations Bridge (second link) or this Owner's Manual (third link).
This section is added by the Deployment Team. No editing necessary.
Project Overview
Only on Global Sites

The Deployment Team will add an Overview if one has been created by Instructional Design, or if one was supplied by the site owner.
To add a Project Overview, see Appendix - Add Overview.
Regional Site Selection
Only available on Global Sites

Users can select their applicable regional site.
Associated Tools & Projects
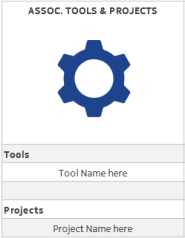
Site Owners can add links to associated tools or projects here. As an example, the Probe team has added a link to the Probe Data Tools. Ideally the links point to existing Operations Hub sites, or directly to tools if necessary.
Users can find links to Global Project sites here.
To add a hyperlink, see Appendix - Add a Hyperlink.
Project Information
Info available in this section will vary depending on Global or Regional (Regional shown below)
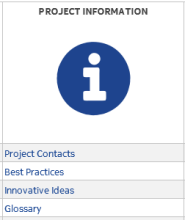
The Project Information section should contain useful info for end-users. The section comes pre-populated with the following sections, outlined below. Additional items can be added as Site Owners see fit.
Project Contacts section
The Project Contacts page is a table that should be maintained by Site Owners. All relevant RMC and GPO contacts should be updated here.
To edit a table, see Appendix - Table Editing
Best Practices section
This section will be maintained by the Deployment Team.
Innovative Ideas section
This section will be maintained by the Deployment Team.
As a Site Owner it is a requirement that the Service Level Agreement be adhered to.
Glossary
This is a link to the HERE Glossary. Added and edited by the Deployment Team.
Project Documents
Info available in this section will vary depending on Global or Regional (Regional shown below)
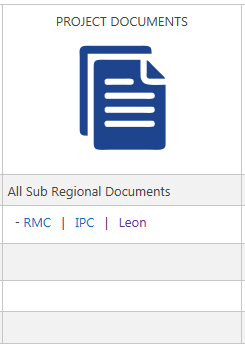
All Regional Project sites come with Document Libraries for each organization.
Add Documents to an existing library, see Appendix - Add Documents to Library
Add Documents on the Content Server, see Appendix - Link to a Document
Add an all new Document Library, see Appendix - Create new Document Library
Training & Support
Info available in this section will vary depending on Global or Regional (Regional shown below)
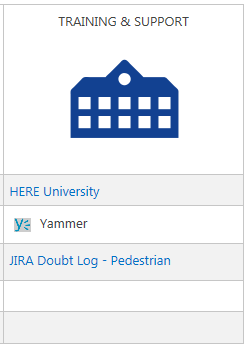
The Training & Support section can provide users with links to HERE University modules, if they exist. The section comes with a link to HERE University and a link to the applicable JIRA Doubt Log project.
Applicable Yammer groups can be linked to the site.
Site Owners and the Deployment Team should work together to ensure this section provides relevant training links.
The Instructional Design team can provide links directly to existing HERE University modules. Site Owners can work with the Deployment Team to get those links.
Project Tracking
This section is part of the old template, and is not being implemented on new sites.
If enabled on a site the Tracking & Issues section is set up as a starting point for Site Owners. We provide an Issues tracking list and a simple Calendar. Other options and suggestions could be as follow:
- Link to a Tableau Dashboard
- Backlogs
- KPI's
- Scope Tracking Sheets
Reach out to the Deployment Team for help with this section.
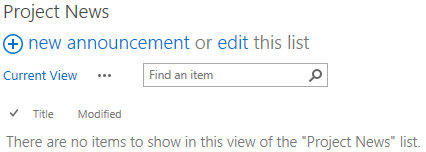
The Project News section provides a link to an Announcements list, with the option to subscribe via RSS to any new Announcements.
Project News
There may be different setups for News on Ops Hub sites.

Click this button to subscribe via RSS feeds to the Site Updates section.
Site owners will maintain the Site Updates list with postings about new updates made to the site, be it new documents, updated documents, or any other site enhancement.

Click on All Project News to see the latest news, or click the RSS icon to subscribe.
Or view the Project News listing on the Home pages of newer sites.
TOOL SITE GUIDELINES
Tool Overview
See Project Site Guidelines - Project Overview for Overview maintenance.
Tool Info
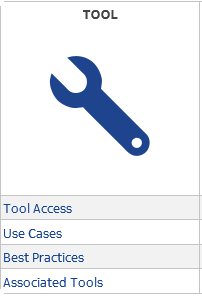
The Tool section contains information that end users need to know in order to use the tool.
Tool Access
The tool access page should contain relevant information for how an end user can access the tool. Some bullet points are provided as guidance for Site Owners. Please remove these bullet points when ready.
To Edit the page follow the editing instructions in Appendix - Page Editing
Use Cases
Follow the guidelines provided on the Use Cases page to add relevant info for end users. To edit the page, see the Appendix above.
Best Practices
This section will be maintained by the Deployment Team.
Associated Tools
Add hyperlinks to any tools that end users need to use in conjunction with this tool, i.e. Asset Viewer is an associated tool with EGIS.
To add hyperlinks, see Appendix - Add a Hyperlink.
Please remove the guidance text when complete.
Tool Documents
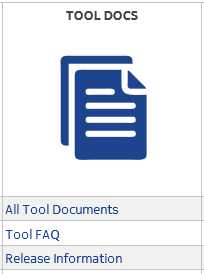
All Tool Documents
This Document Library should be used for all relevant Tool documentation that an end user needs to operate the tool. This can include (but not be limited to) User Guides, Work Instructions, SOP's.
For help adding documents, or with Document Libraries, see the Projects Documents section.
Tool FAQ
The Tool FAQ list is set up with two columns: Question & Answer/Resolution. Click Add New Item to create a new entry.

As a Site Owner if you have an existing spreadsheet or document with existing FAQ's, you can add this to the All Tool Documents library and remove the hyperlink for the Tool FAQ.
Release Information
Use this library as a repository for Software Release Notes. This is a view built on the All Tool Documents library. By selecting Release Notes as the Doc Type when adding a new document, the item will appear in the Release Notes section.
If there are Release Notes on the Content Server, see Appendix - Link to a Document
Tool Support

Troubleshooting
Currently, the Troubleshooting list is the same as the Tool FAQ list. If as the Site Owner you determine that you do not need both, than you can remove one or the other. Simply remove the hyperlink from the table.
Feedback
This section will be removed from future tool sites. You may see a Yammer link here, or an email contact.
Tier 1 Support
This link is added and maintained by the Deployment Team. It guides end users to the applicable JIRA project for support.
Tool Enhancements
All tool sites come equipped with the Innovative Ideas portal for the particular tool.
This section will be maintained by the Deployment Team.
As a Site Owner it is a requirement that the Service Level Agreement be adhered to.
Tool Training
The training section can provide users with links to HERE University modules, if they exist. The section comes pre-built with a link to HERE University and a link to a Training Schedule if necessary.
Site Owners and the Deployment Team should work together to ensure this section provides fresh links, and updated content as needed.
The Instructional Design team can provide links directly to existing HERE University modules. Site Owners can work with the Deployment Team to get those links.
Tool News
See Project Site Guidelines - Project News for News section help.
SERVICE LEVEL AGREEMENT
We are setting up a Service Level Agreement for the innovative idea throughput, not only on the Tools and Project Pages, but for all ideas submitted. We believe that in order for this process to be a success, and to encourage throughput of new ideas, we need to treat each idea seriously and each submitter with respect. The failure of past approaches to innovations program has been stagnation and lack of explanations as to why an idea may or may not be pursued. With our collective knowledge and expertise, we can reduce bottlenecks while at the same time inform more users of developments and increase project and tool awareness.
The Service Level Agreement is therefore:
Level 1: Review Stage
Commitment to review ideas submitted through to the Project or Tools page you are responsible for no later than 3 months after the submission. E.g. I submit innovation on January 1st, you promise to review the idea, and respond to the submitter’s entry by March 31st.
During the Review Stage, you commit to set all ideas under review to status “Review” on the submission. This does not complete the 3 month review commitment. By reviewing the idea, this does not mean that you are committing to pursue, prototype, test these innovation ideas. This simply means that you will decide whether something has merit to pursue, or should be rejected. This will involve setting the status of the submission to one of the following status:
Level 1a: Backlog/Parked:
By setting this status, you are agreeing to revisit this idea in the future. You believe that the idea has some metric, but strategically it is not something we can pursue at the moment. By setting this status you commit to completion of the actions log with your name and reasons, in as full a description as possible, as to why this is on the backlog.
Level 1b: Returned:
By setting this status, you are asking the submitter for more information on the idea. You also commit to filling in the actions log, with your name and your reasons for returning the submission.
Level 1c: Closed:
By setting this status, you are telling the submitter that the idea is not something that we wish to pursue. You also commit to filling in the actions log, with your name and your reasons for closing the submission.
Level 1d: Piloting:
By setting this status, you are telling the submitter that their idea has merit and will be piloted/prototyped by resources to check further on its value/improvement. You should fill out the actions log with your name and your current plan to pilot. You should, where possible, involve the submitter in the discussions on piloting.
Level 1e: Approved:
By setting this status, you are telling the submitter that their idea has merit and has been adopted into working practices. This would only be part of Level 1 if the innovation was full formed and ready for release without need for further piloting/investigation. You should fill out the actions log with your name and reasons for approval.
By setting any of the above Level 1 status (a-e), within the 3 months from submission you have completed the Level 1 Service Level Agreement.
Level 2: Re-Review Stage
Commitment to re-review on an annual basis innovations set with a status Backlog/Parked. Commitment to inform and update the actions log on the innovation with Pilot information on a regular basis as the piloting evolves. Commitment to set the appropriate status after piloting. (Closed or Approved).
APPENDIX
Fix Stellent Links
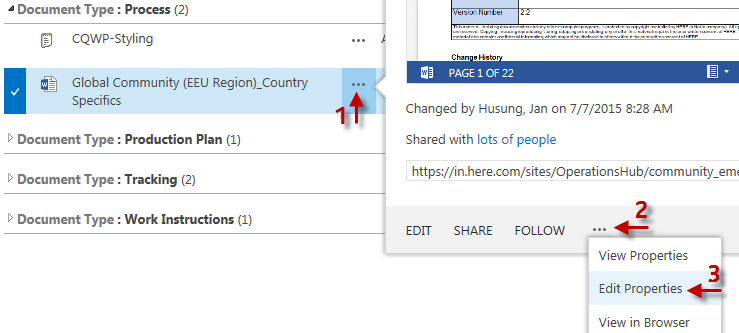
See screenshots below for how to update Content Server hyperlinks on documents.
Edit the properties of a document by clicking the three dots (1), clicking the three dots again (2), and then Edit Properties (3).
Update the URL and description fields
OLD URL

NEW URL

Simultaneous Editing
With SharePoint 2013 co-authoring is possible on all Office documents. However, if you want to enable simultaneous editing in Excel, you will have to use the Web App version, and not open the document locally in the client application on your machine.
There are certain features that may not be supported in the Web version of excel, for example Sheet Protection. Data Validation may also not be available within the Web App.
Please read further for all differences between Web App Excel and the client application: Microsoft Support
Follow below guidelines to allow co-authoring in Excel tracking sheets on the Hub:
- Use Internet Explorer, if possible.
- Ensure you have at least Contribute Permissions on the site: check with Site Owner or with the Ops Hub Team.
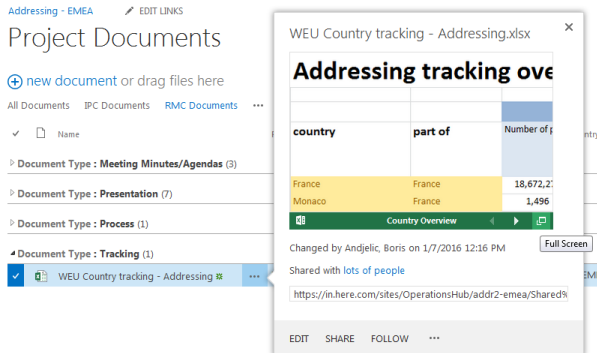
- Make sure to open the sheet in the Web App version. Click on the three dots next to the sheet name. Use the Full Screen feature to open the workbook in the browser.
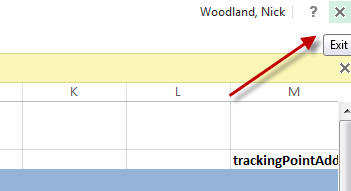
- Exit the document after editing, there is no saving in the Web App. It is done automatically.
Set Permissions
All members of a Site's Permission Group can add or remove users as needed.
Shown below is the process for an Ops Bridge site, the same process can be followed for a Tool or Project site.
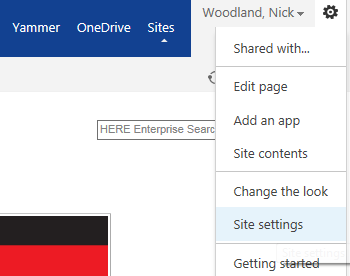
Enter the Site Settings page.
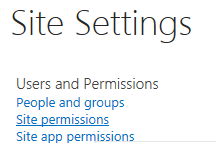
Enter the Site Permissions options.
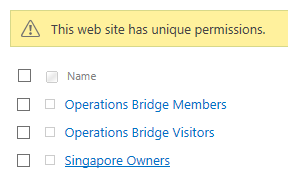
Select the Site Permission Group.
For Tool or Project sites, this is where users would select the appropriate group. Shown below is an Ops Bridge site group.
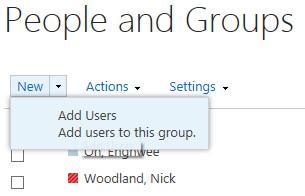
To add a user to this group which has Full Control of the site, select New.
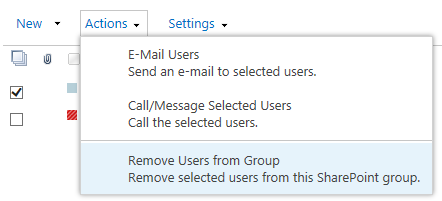
To remove users from a group, check the box next to the name, and select Actions.
Page Editing
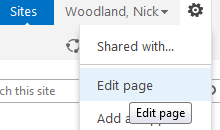
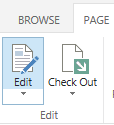
To edit a page, click the Settings icon next to the username, and select Edit page.
You can also use the toolbar on the right to access Edit, if it's available.

Or you can use the Page tab, and Edit.
If you don't see these options, please contact us: Ops Hub.
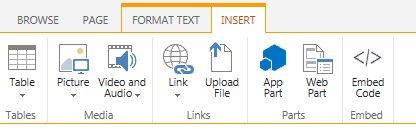
Once in edit mode, the Editing Ribbon will appear at the top of the page. The Ribbon opens on the Format Text tab. This is where you can add rich text.

Click the Insert tab to add hyperlinks, pictures, tables or to upload a file.
When edits are complete, click Save to save your edits. Or use the Save option in the upper right.

Other save option

Add Overview
Navigate to the Project/Tool Overview section. Click the Settings icon next to the username, and select Edit page
You are now editing a Page, not a webpart.
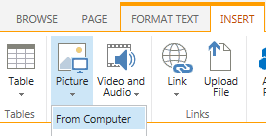
Click inside the empty page, and select the Insert tab.
Select the picture drop-down, and select From Computer
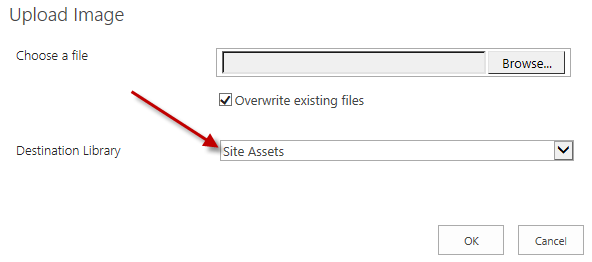
IMPORTANT STEP: make sure to select Site Assets in the Destination Library: section. Browse to select image, then click OK.
Once the picture is added, save the changes, with either option below.
Create a Yammer Group
Navigate to Yammer via the link in the Footer below.
Under your name, hover over Groups and select Create Group.
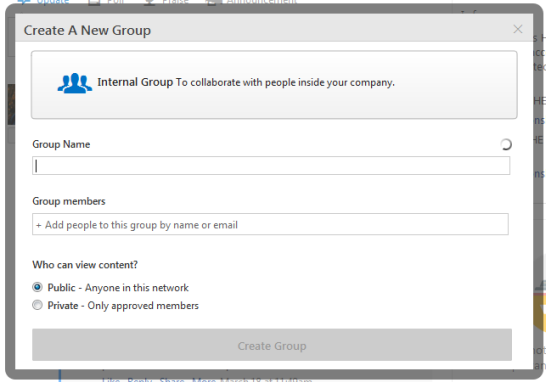
Now set up your Group with the appropriate fields. We suggest using 'Country Name' Ops Bridge for the Group name - Singapore Ops Bridge, for example. Members can be added now, but can also be added after the Group is created. Make the Group Public. Then click Create Group.
For additional help with Yammer, please see the Yammer User Guide on the HERE IT Yammer Group.
Add a Hyperlink
Click Site Actions > Edit Page
Click in a Page, in a Table, or in a Content Editor webpart wherever you want the link to appear.
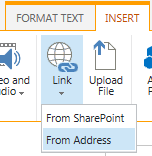
Select the Insert tab.
Select the Link option and From Address.
Enter the Text to Display and the URL in the Address.
To add a hyperlink for a document library or list, or some other content located on the site navigate to the list or library and copy the address in the address bar of the browser.
Correct URL:
https://in.here.com/sites/OperationsHub/probe/Community%20Documents/Forms/AllItems.aspx
Incorrect URL:
https://in.here.com/sites/OperationsHub/probe/Community%20Documents/Forms/AllItems.aspx?PageView=Shared&InitialTabId=Ribbon.WebPartPage&VisibilityContext=WSSWebPartPage

To edit an existing link, put the cursor within the hyperlinked text. Select the Format option in the Link Tools tab.
Change the URL in the URL: box. You can also set the option to open the link in a new window.
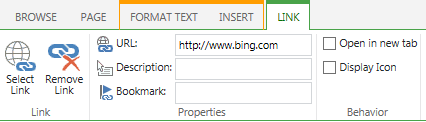
Table Editing
To edit a Table, go into Edit Mode
Click within the Table to activate the Table Tools.
Use the Layout tab for common table editing options: inserting/removing columns or rows, merging cells, changing width or height of rows or columns. Use the Design tab to change the style of the table using the Styles presets, or to make the Header or Footer Row or the First Column bold.

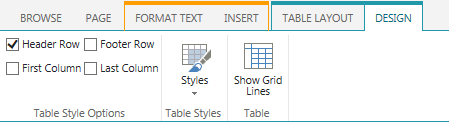
To add a new row to the table, place the cursor in the appropriate row, and then select either Insert Above or Insert Below. Same goes for adding additional columns - use Insert Left or Insert Right
To save your edits, click Save in the Ribbon or in the upper right.
Add Documents to Library
Start within a Document Library, and select the new document option.

Browse to select the file. Click OK.
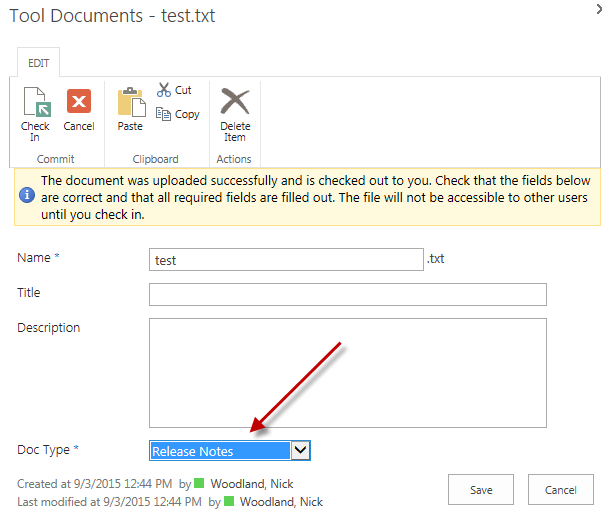
Complete all the required fields which are marked with an asterisk.
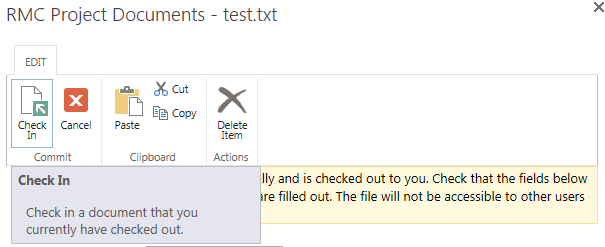
When ready, click Check In, to add the document to the library.
Link to a Document
Start within a Document Library and select the Files tab.
If you do not see the Files tab, click inside the document library somewhere, or select a check box next to a document to activate the Editing Ribbon. If this doesn't work, go into Editing Mode on the page.
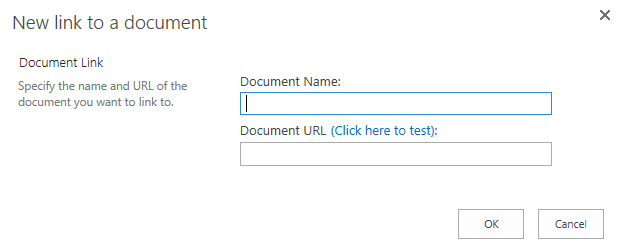
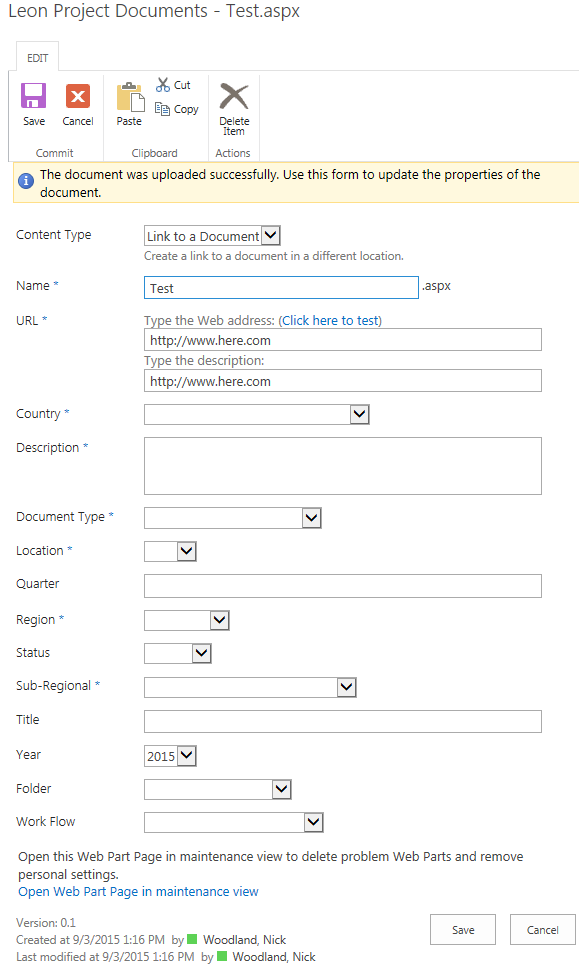
Select the New Document dropdown, and select Link to a Document.

Add a Document Name and Document URL for the document. See below for adding a Content Server URL.
GETTING A CONTENT SERVER URL
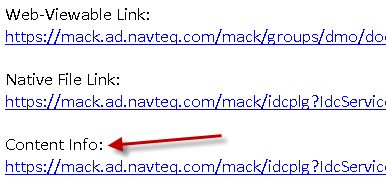
Navigate to the Contents section of a document by clicking the Info button.

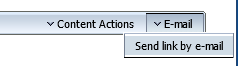
On the Contents screen - in the upper right - select Email and then Send By Email.
Then copy the Content Info URL into the Document URL section.
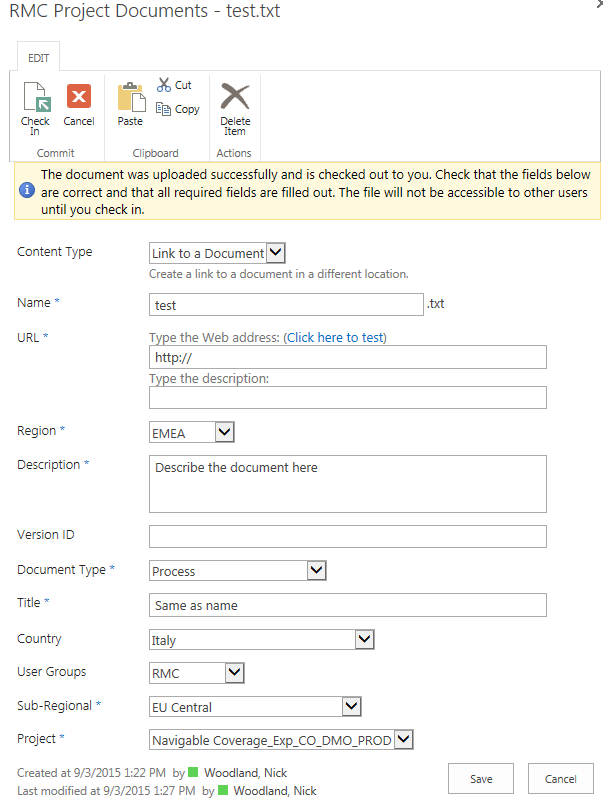
When the Name and URL are added, click OK. Fill in the remaining fields as shown below. Required fields are marked with asterisks.
The fields shown will vary depending on the document library used.
Click Save, or Check In, if the document is checked out to you, when done.
Create Document Library
Navigate to the Site Content link in the Settings drop-down. Or select it from the Shortcuts section on the left side of the site.

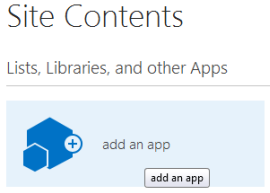
Select add an app
In the Your Apps window, select Document Library and enter a name for the Library. Click Create.

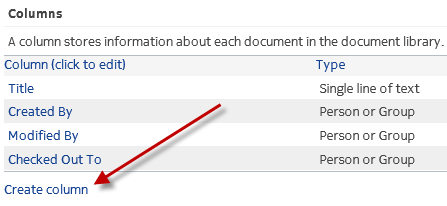
If you want to add columns to your Document Library, select Library Settings
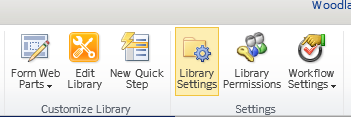
Then select Create Column
For additional help with Advanced Library Settings, you can either contact us at The Deployment Team or you can visit HERE University for further training.
 Email
Email Feedback
 Yammer
 Search
 Site Index