INTRODUCTION
- Status: CURRENT
- Version: 3
- Date: 2/18/2016
- Creator: Nick Woodland
CHANGE REVISION HISTORY
| Version | Status | Date | Handled By | Description of Change |
|---|---|---|---|---|
| 1.0 | In Progress | 3/19/15 | Nick Woodland | First Draft of Bridge Manual |
| 1.5 | Released | 8/05/15 | Nick Woodland | Added section for Service Level Agreement. Waiting on finalized version of SLA. |
| 2.0 | Current | 10/26/15 | Nick Woodland | Added section to Appendix for managing Permissions. |
| 3.0 | Current | 2/18/16 | Nick Woodland | Added section for RMC Team Site. |
SCOPE
This document is intended for Ops Bridge Site Owners managing a site within the Operations Bridge. This manual will provide Owners with the necessary steps for editing their sites.
SITE READINESS CHECKLIST
Site Owners can use the online checklist to help gauge their progress toward completion prior to publication of the site to a wider audience.
Please see here for the Bridge Site Checklist
REQUIREMENTS
Deployment Team
- Creates the country site as needed from internal template
- Edits basic information to get site ready for Site Owner
- Site Title, Flag and Map
- Contact Details
- Yammer Link
- Site RSS Subscriptions
- Sets up initial Permissions
Site Owner
- Provides Deployment Team with necessary information to get initial site built
- Becomes primary site manager
- Maintains fresh content
- Informs Deployment Team of any Site Owner changes
- Becomes champion for their site
- Follows items outlined in the SharePoint Governance and Best Practices document.
DEFINITIONS & ACRONYMS
- Ops Bridge (OB) = Operations Bridge
- Ops Hub (OH) = Operations Hub
- Site Owner = Contact identified within the Core Map Group to maintain a site within the Ops Hub.
- Deployment Team = Operations Hub Creators and SharePoint administrators for the Ops Hub.
Review the HERE Glossary for other terms
RESPONSIBILITIES
Owners must provide the Deployment Team with the information outlined in the Requirements section of this document. Once received the Deployment Team will create the site for Owners and complete all the requirements as necessary.
Maintenance on the site will be an ongoing task including both Site Owners and the Deployment Team. Owners will be responsible for the relevance and freshness of the data posted to the site.
Owners will be responsible for reaching out to end-users and creating an environment where they can freely discuss issues with Owners.
The templates created by the Deployment Team are set up to enable this discourse. Owners need to take advantage of this capability.
The Deployment Team will be responsible for ensuring in the long term that content posted on the Ops Bridge is up-to-date and meets the outlined requirements of this document.
The Deployment Team will be responsible for assisting Owners with SharePoint support in the Ops Bridge. This could include how to take training, how to add content to a site, or how to maximize the functionality present in the Ops Bridge.
BRIDGE SITE GUIDELINES
Country At A Glance
This is a brief summary of the most important facts and figures, covering everything from system of government, size and countryside to population, lifestyle and cultural life.
Content types for this section:
- PowerPoints or Documents
- Hyperlinks
- Images
- Text
Database & Admin Information
Use this page to find details about the database including VSAM maps, RMOB details, admin tree info, product and coverage levels, as well as database release notes and any other pertinent information about the database necessary for working in this country.
Content types for this section:
- PowerPoints or Documents
- Hyperlinks
- Images
- Text
Road Sign Reference
Find specifics about country signage here. Additional details can be added showing local sign examples, or there are links provided below to the Feature Recognition sign libraries maintained by AEL
Content types for this section:
- PowerPoints or Documents
- Hyperlinks
- Images
- Text
Contacts
Find all applicable Country Contacts within RMC & GPO.
Content types for this section:
- Hyperlinks
- Images
- Text
D&A Page
These links are included to provide access to some of the commonly used Data Spec pages including the D&A Rules, Project FAQ's, and the Data Spec Map Ops JIRA support network. Site owners do not need to edit or maintain this page.
Content types for this section:
- None - no editing required
Attribute Library
Contains all applicable real world examples for country specific situations. The Attribute Library is organized by the D&A rulebook chapters. Data Spec rules should not be copied to any section.
See the appendix for Editing a Webpart
Content types for this section:
- PowerPoints (prefered) or Documents
Sources
The sources section provides context to country sources available via EGIS/SugarCRM. Versus access to just source metadata, in this section, RMC will provide background on when and how available sources should be utilized. Production teams to leverage this information to make informed coding decisions based on local sources.
Content types for this section:
- PowerPoints or Documents
- Hyperlinks
- Images
- Text
Coding Test
Awareness 'tests' for GPO to solidify their knowledge of various special country situations as relates to particular attributes.
Content types for this section:
- PowerPoints or Documents
Recurring JIRAs & ICE issues
The JIRA’s & Map Feedbacks section hosts examples of recurring situational questions requiring further knowledge sharing between RMC and the Production teams. RMC will provide real world examples and solutions to commonly asked coding questions. Production will reference this information prior to submitting further information requests. Production and RMC will work together to identify additional examples as needed.
Content types for this section:
- PowerPoints or Documents
- Hyperlinks
- Images
- Text
RMC Team Site
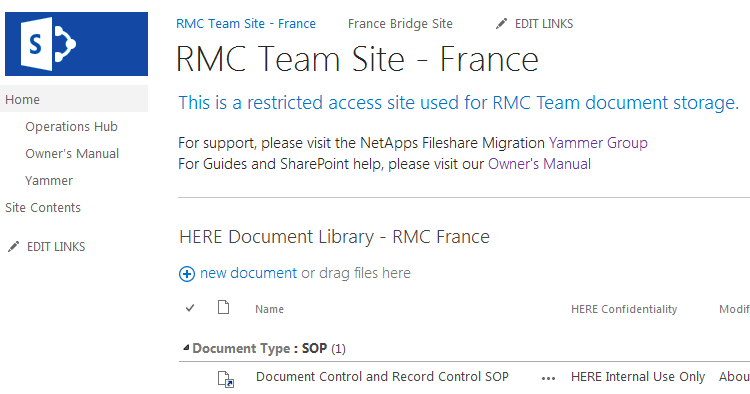
The RMC Team Site is a restricted site available only to the RMC team for the storage of team related documentation.
While the Country Bridge page is available for all users to view and read the content, the Team Site is restricted to the Owners Group of that site. Any user needing access will need to specially request that access.
SharePoint Governance and Best Practices
Please review the SharePoint Governance & Best Practices document from the CMG SharePoint team.
Request Access
Two ways to request access to an RMC Team Site
- Use the prompts on screen when you visit the site to request access.
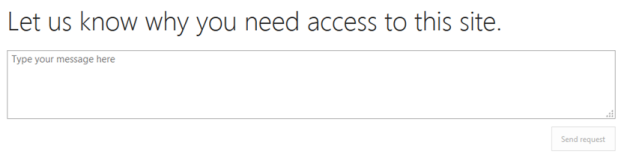
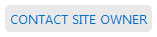
- Navigate to the Country Bridge Site and contact the Site Owner to request access to the Team Site. Button from Bridge Site shown here.
Granting Access
If you are an Ops Bridge Site Owner, you will receive requests for access from users.
To grant access, please add users to the Country Owners group: 'France Owners', for example. Do not add them individually.
Manage Permissions
See the Appendix for Setting Permissions.
Please reach out to the Ops Hub Team for help if you have never worked on permissions before, or if you need help.
Navigation
Site Navigation
Use the links along the top bar to access this Team Site's home page, or to reach the main Country Bridge site.

Support Navigation
For support, post or review questions in the Yammer Group, or review the guidelines and How-to's within the Owner's Manual.
Access using the links highlighted below.

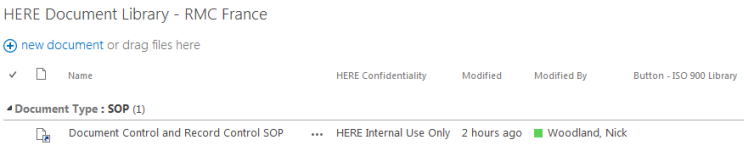
Documentation
There is an ISO approved Document Library available to store all documentation.
Follow the below steps when adding documents:
- Select the appropriate Document Type.
- Select the appropriate HERE Confidentiality clause.
SERVICE LEVEL AGREEMENT
Stay Tuned
EDITING GUIDES
Set Permissions
All members of a Site's Permission Group can add or remove users as needed.
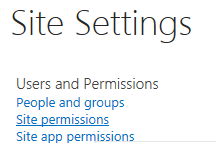
Enter the Site Settings page.
Enter the Site Permissions options.
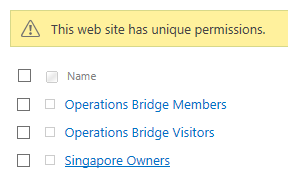
Select the Site Permission Group.
To add a user to this group which has Full Control of the site, select New.
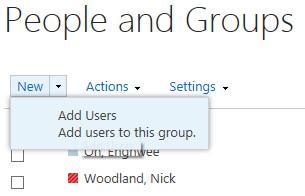
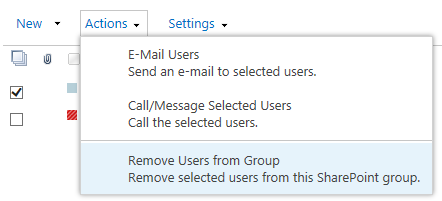
To remove users from a group, check the box next to the name, and select Actions.
Page Editing
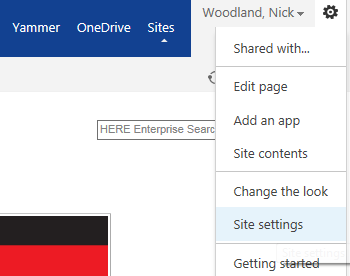
To edit a page, click the Settings icon next to the username, and select Edit page.
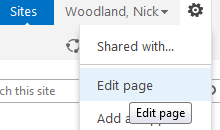
If you don't see this option, please contact us: Ops Hub.
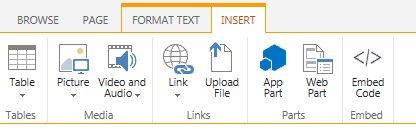
Once in edit mode, the Editing Ribbon will appear at the top of the page. The Ribbon opens on the Format Text tab. This is where you can add rich text.

Click the Insert tab to add hyperlinks, pictures, tables or to upload a file.
When edits are complete, click Save to save your edits. Or use the Save option in the upper right.

Other save option

Edit a Webpart
In some cases, you may need to edit a Webpart - for example, to edit the font color in the Attribute Library sections.
On the Attribute Library page, go into Edit Mode as outlined in the Page Editing section.
Then click the small drop down in the Webpart, and select Edit Webpart
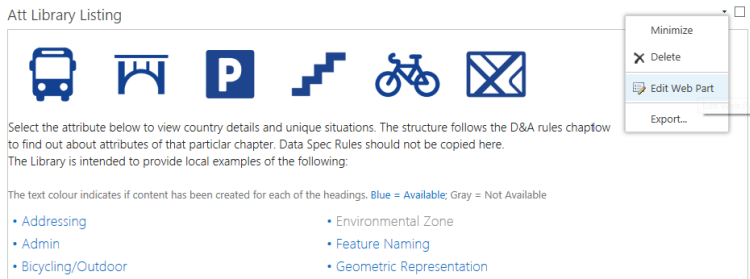
Image cropped for example
Now you can edit the text in the webpart.
Once complete, first click OK in the webpart editing menu.
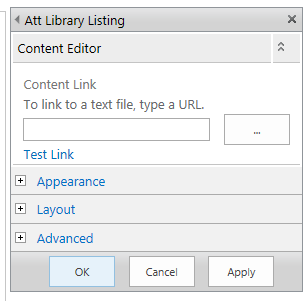
Then click Save in the Editing Ribbon, or on the upper right side of the page - as detailed in the Page Editing section above.
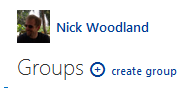
Create a Yammer Group
Navigate to Yammer via the link in the Footer below.
Under your name, hover over Groups and select Create Group.
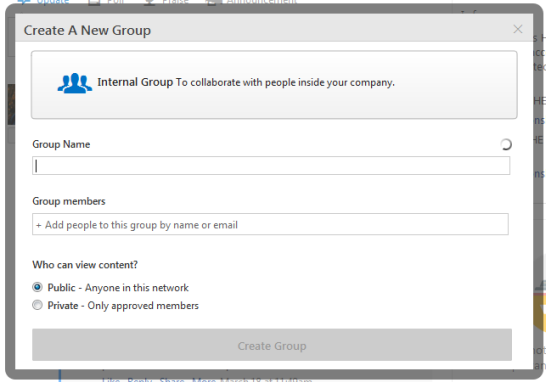
Now set up your Group with the appropriate fields. We suggest using 'Country Name' Ops Bridge for the Group name - Singapore Ops Bridge, for example. Members can be added now, but can also be added after the Group is created. Make the Group Public. Then click Create Group.
For additional help with Yammer, please see the Yammer User Guide on the HERE IT Yammer Group.
Add a Hyperlink
Go into Editing Mode as outlined in the Page Editing section.
Click on a Page, in a Table, or wherever you want the hyperlink to appear. You can also select text already typed on a page.
Select the Insert tab, then select the Link dropdown.
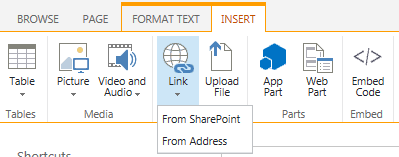
You can use the From SharePoint option to select an existing page (or a document list or library) on SharePoint. Or use the From Address option to paste in a URL you have copied from somewhere.
To edit an existing link, put the cursor within the hyperlinked text. Select the Link tab.
Change the URL in the URL: box. You can also set the option to Open in a new tab or remove the link altogether.
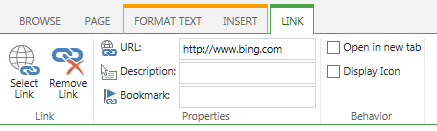
Table Editing
To edit a Table, go into Edit Mode
Click within the Table to activate the Table Tools.
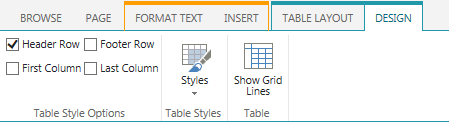
Use the Layout tab for common table editing options: inserting/removing columns or rows, merging cells, changing width or height of rows or columns. Use the Design tab to change the style of the table using the Styles presets, or to make the Header or Footer Row or the First Column bold.

To add a new row to the table, place the cursor in the appropriate row, and then select either Insert Above or Insert Below. Same goes for adding additional columns - use Insert Left or Insert Right
To save your edits, click Save in the Ribbon or in the upper right.
Link to a Document
Start within a Document Library (Attribute Library, for example) and select the Files tab.
If you do not see the Files tab, click inside the document library somewhere, or select a check box next to a document to activate the Editing Ribbon. If this doesn't work, go into Editing Mode on the page.
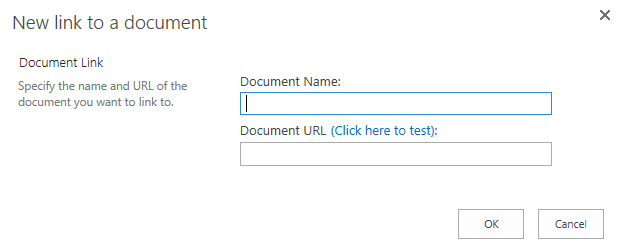
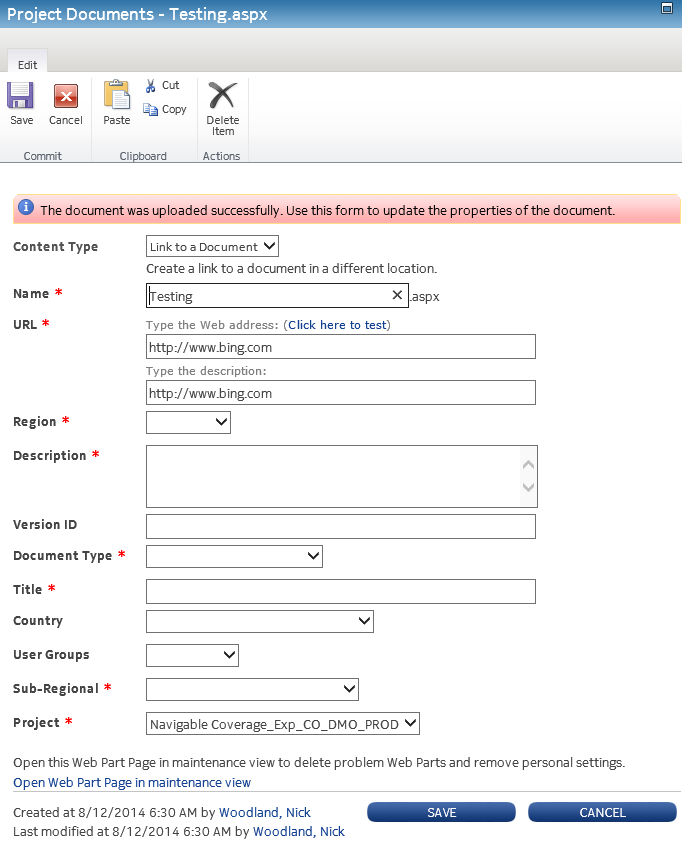
Select the New Document dropdown, and select Link to a Document.

Add a Document Name and Document URL for the document. See below for adding a Content Server URL.
GETTING A CONTENT SERVER URL
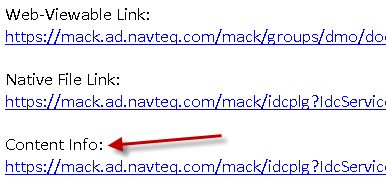
Navigate to the Contents section of a document by clicking the Info button.

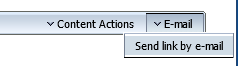
On the Contents screen - in the upper right - select Email and then Send By Email.
Then copy the Content Info URL into the Document URL section.
When the Name and URL are added, click OK. Fill in the remaining fields as shown below. Required fields are marked with asterisks.
The fields shown will vary depending on the document library used.
Click Save when done.
Create Document Library
Navigate to the Site Content link in the Settings drop-down. Or select it from the Shortcuts section on the left side of the site.

Select add an app
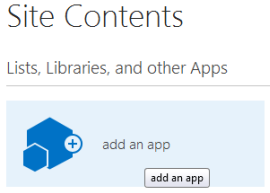
In the Your Apps window, select Document Library and enter a name for the Library. Click Create.

If you want to add columns to your Document Library, select Library Settings
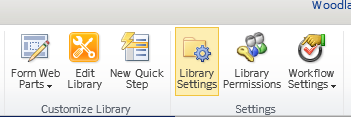
Then select Create Column
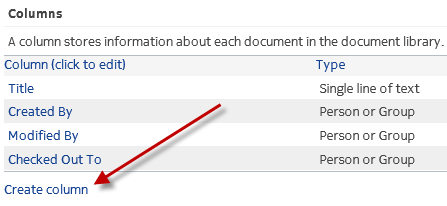
For additional help with Advanced Library Settings, you can either contact us at The Deployment Team or you can visit HERE University for further training.
 Email
Email Feedback
 Yammer
 Search
 Site Index